How To Make Homemade Christmas Tree With Clay

Dec. 6, 2018
You Will Need:
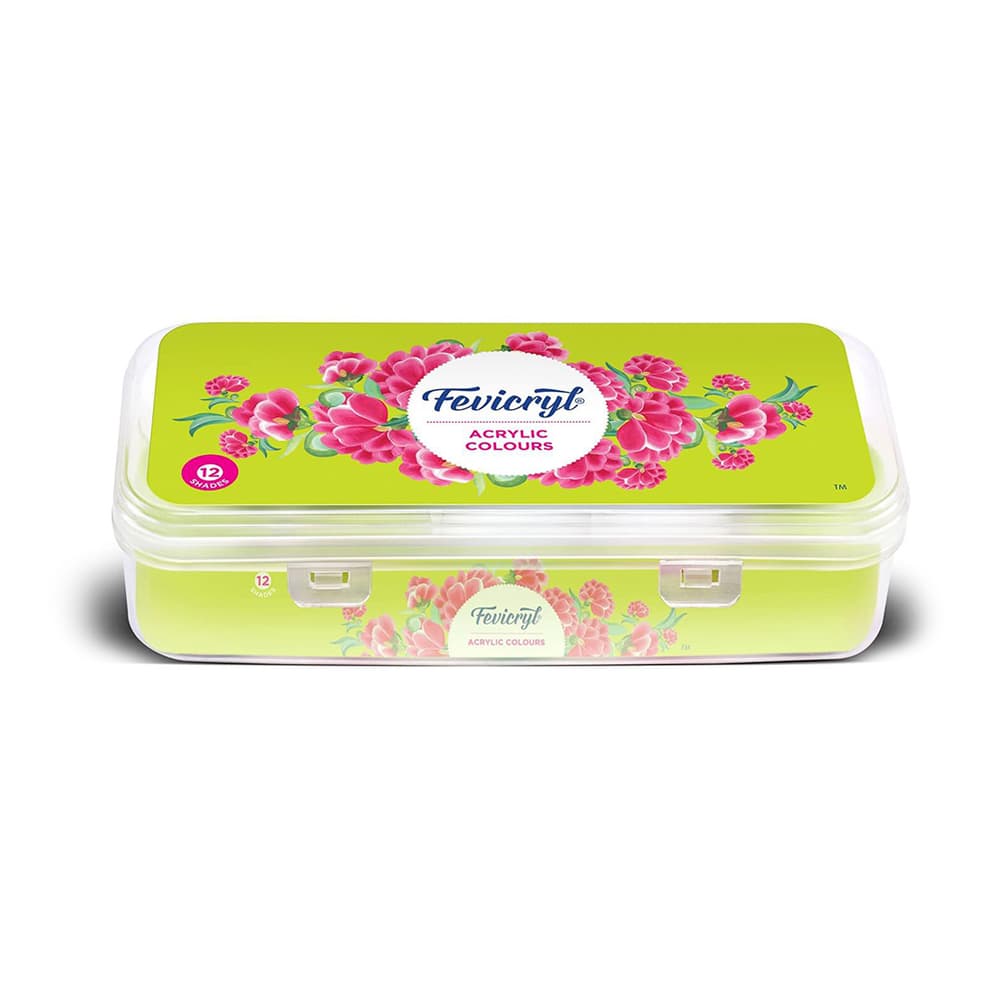
Fevicryl Acrylic Colours Crimson 04, White 27, Neon Green 012, Fevicryl 3 D Cone Outliner Non Sticky Orange 705, Fevicryl Mouldit, Fevicryl Fabric Glue, Rolling Pin, Paper Cutter, News Paper, Flower Print A4 Paper, Scissors, Flower Making Metal Wire, Clay Carving Tools, Golden Glitter Powder, Ornamental Stones (Small Sized Orange Coloured), Threads, Colour Palette, Water Container
Description :
Miniature is in and how! Make a small homemade Christmas tree for your desk and for your friends and family too; after all, this is the season of gifting. Mouldit and clay modelling techniques make it so simple to make this cute Christmas tree DIY. Just follow these step by step guide and make adorable clay Christmas tree table centrepieces on this Christmas Eve.Running out of Christmas decoration ideas? Worry no more! Simply check some easy and creative Christmas DIYs like Handmade Christmas Wreath Making, DIY Hanging Snowflake Decorations, Handmade Christmas Tree Making At Home, How to Make Reindeer Party Mask, Handmade Merry Christmas Greeting Card Making and make some exclusive Christmas décor this festive season.
If you enjoy clay art and love making clay DIY projects then you must definitely check out DIYs like Diy Shoe Shape Mobile Stand, Handmade Key Holder Platter, Custom Made Car Cuff Links, DIY Door Dangler and many more at Hobby Ideas!
You can check out the art & craft products offered by us in the Catalogue section of the page. This DIY is mainly made using Fevicryl Acrylic Colour, Fevicryl Mouldit, Fevicryl Fabric Glue, Rolling pin, carving tools and newspaper.
STEP 1 : Moulding the Mouldit Clay dough
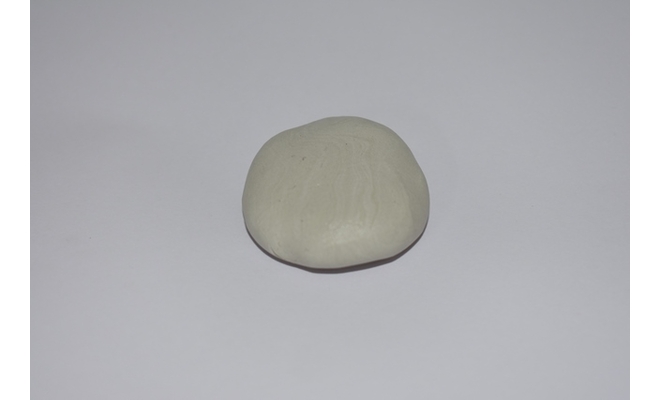
• Take Mouldit resin base and hardener; mix it thoroughly to make even dough.
STEP 2 : Making a spiral
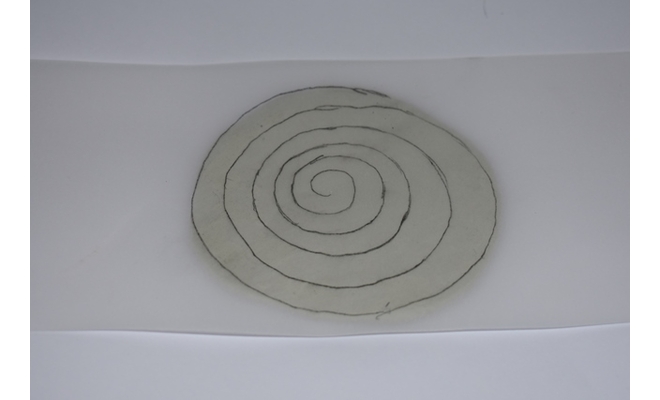
• Take the dough ball; roll it to make the medium thin slab using rolling pin. Let it get semi dry.
• Cut the circle measuring 3” diameter from the slab.
• Draw the radiating spirals starting from the centre towards the outer circumference of the circular slab.
STEP 3 : Cutting the spiral
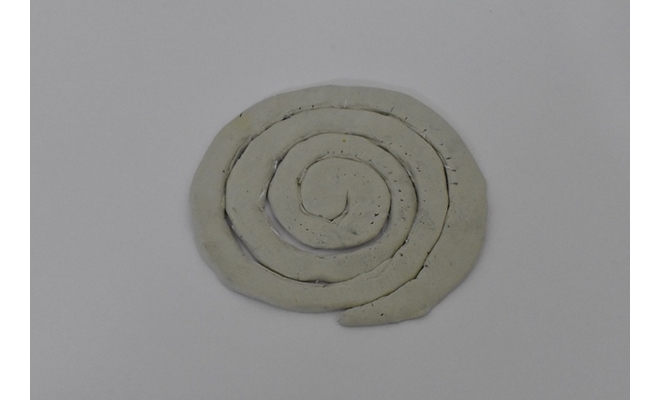
• Cut along the spiral lines neatly with paper cutter
STEP 4 : Making a newspaper cone
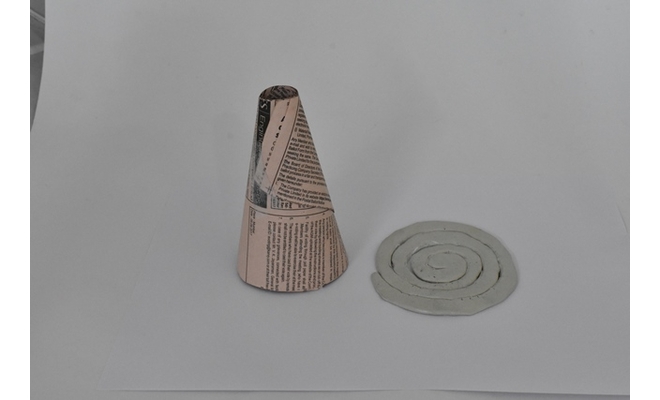
• Take a newspaper and make a self-standing cone shape out of it.
STEP 5 : Making the clay Christmas tree
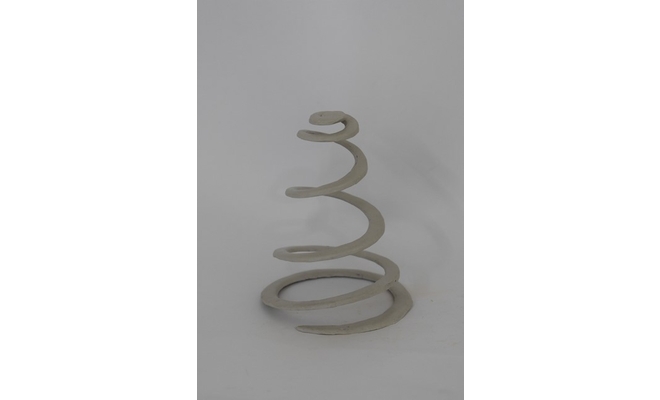
• Place the spiral slab on the newspaper cone for support and to give it an effect of X’mas tree. Let it dry completely.
• Refer to the image.
STEP 6 : Painting the clay Christmas tree
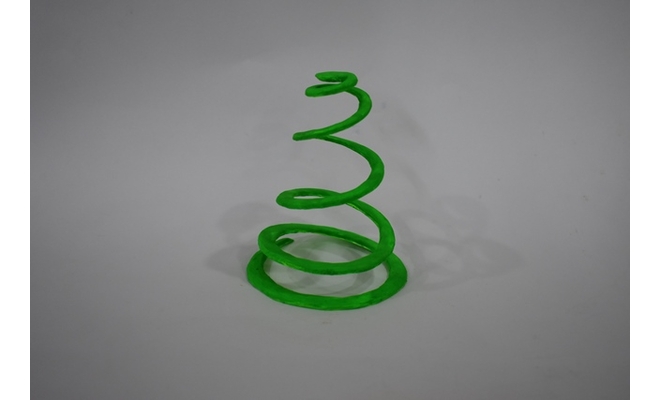
• Take the spiral shaped X’mas tree, paint it with the base coat of Acrylic colour White 27. Let it dry.
• Paint the second coat of Acrylic colour Neon Green 012.
• Leave it to dry completely.
STEP 7 : Sticking the stones
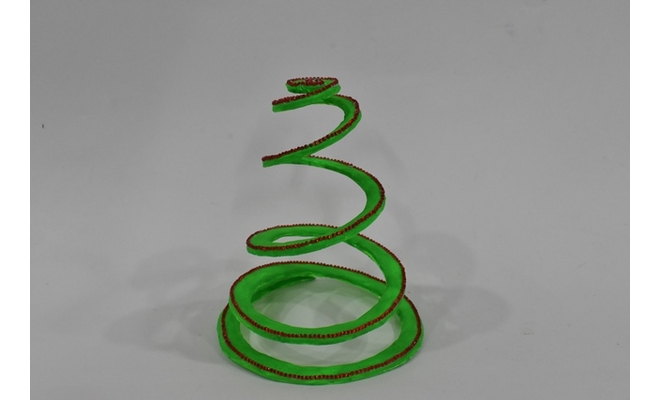
• Enhance the spiral edges of the tree by sticking the orange coloured ornamental stones using Fabric Glue.
• Let it dry.
STEP 8 : Making Christmas tree ornaments
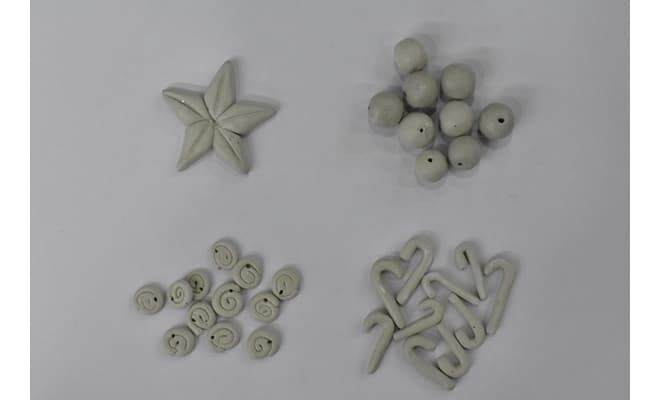
• Take some clay to make the tiny candy canes, ornaments, star and the sweets out of it. Let it get semi dry.
• Pierce holes on the top of the ornaments, candy canes and the sweets and insert a ring into each one of them.
• Leave it to dry.
STEP 9 : Painting the ornaments
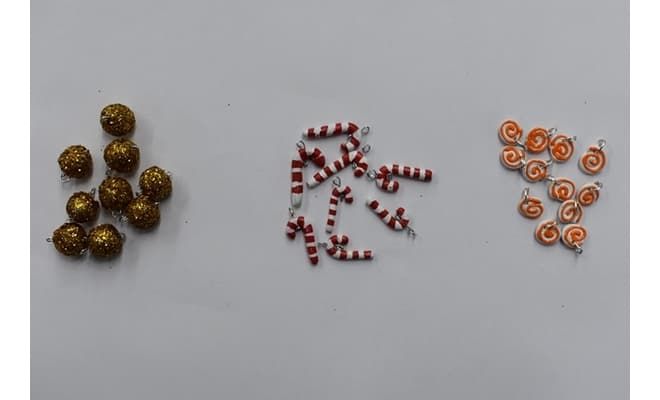
• Paint the candy canes with Acrylic Colours Crimson 04 and White 27.
• Paint the sweets with 3 D Cone Outliner Non Sticky Orange 705 and Acrylic Colour White 27. Let it dry.
• Paint the ornaments by sticking the glitter powder using Fabric Glue. Let it dry.
STEP 10 : Painting the star and final assembly
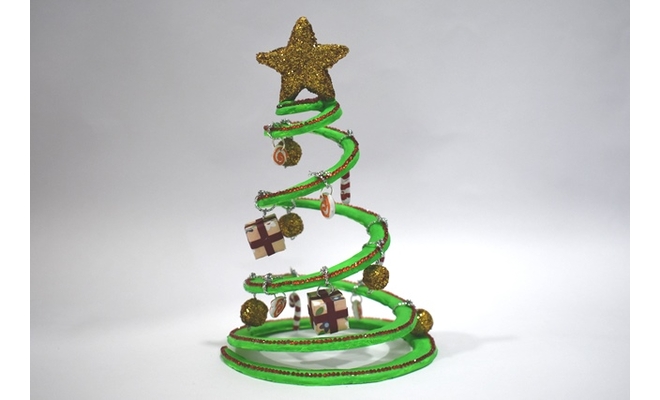
• Similarly Paint the star by sticking the glitter powder using fabric glue. Let it dry.
• Take the printed paper and 3 mm quilling strip to make tiny gift boxes out of it using Fabric Glue for sticking.
• Dangle all the decorative elements on the tree aesthetically using silver thread.
• Stick the star on the top side of the tree.
• Refer to the image.


 +91 99676 55545