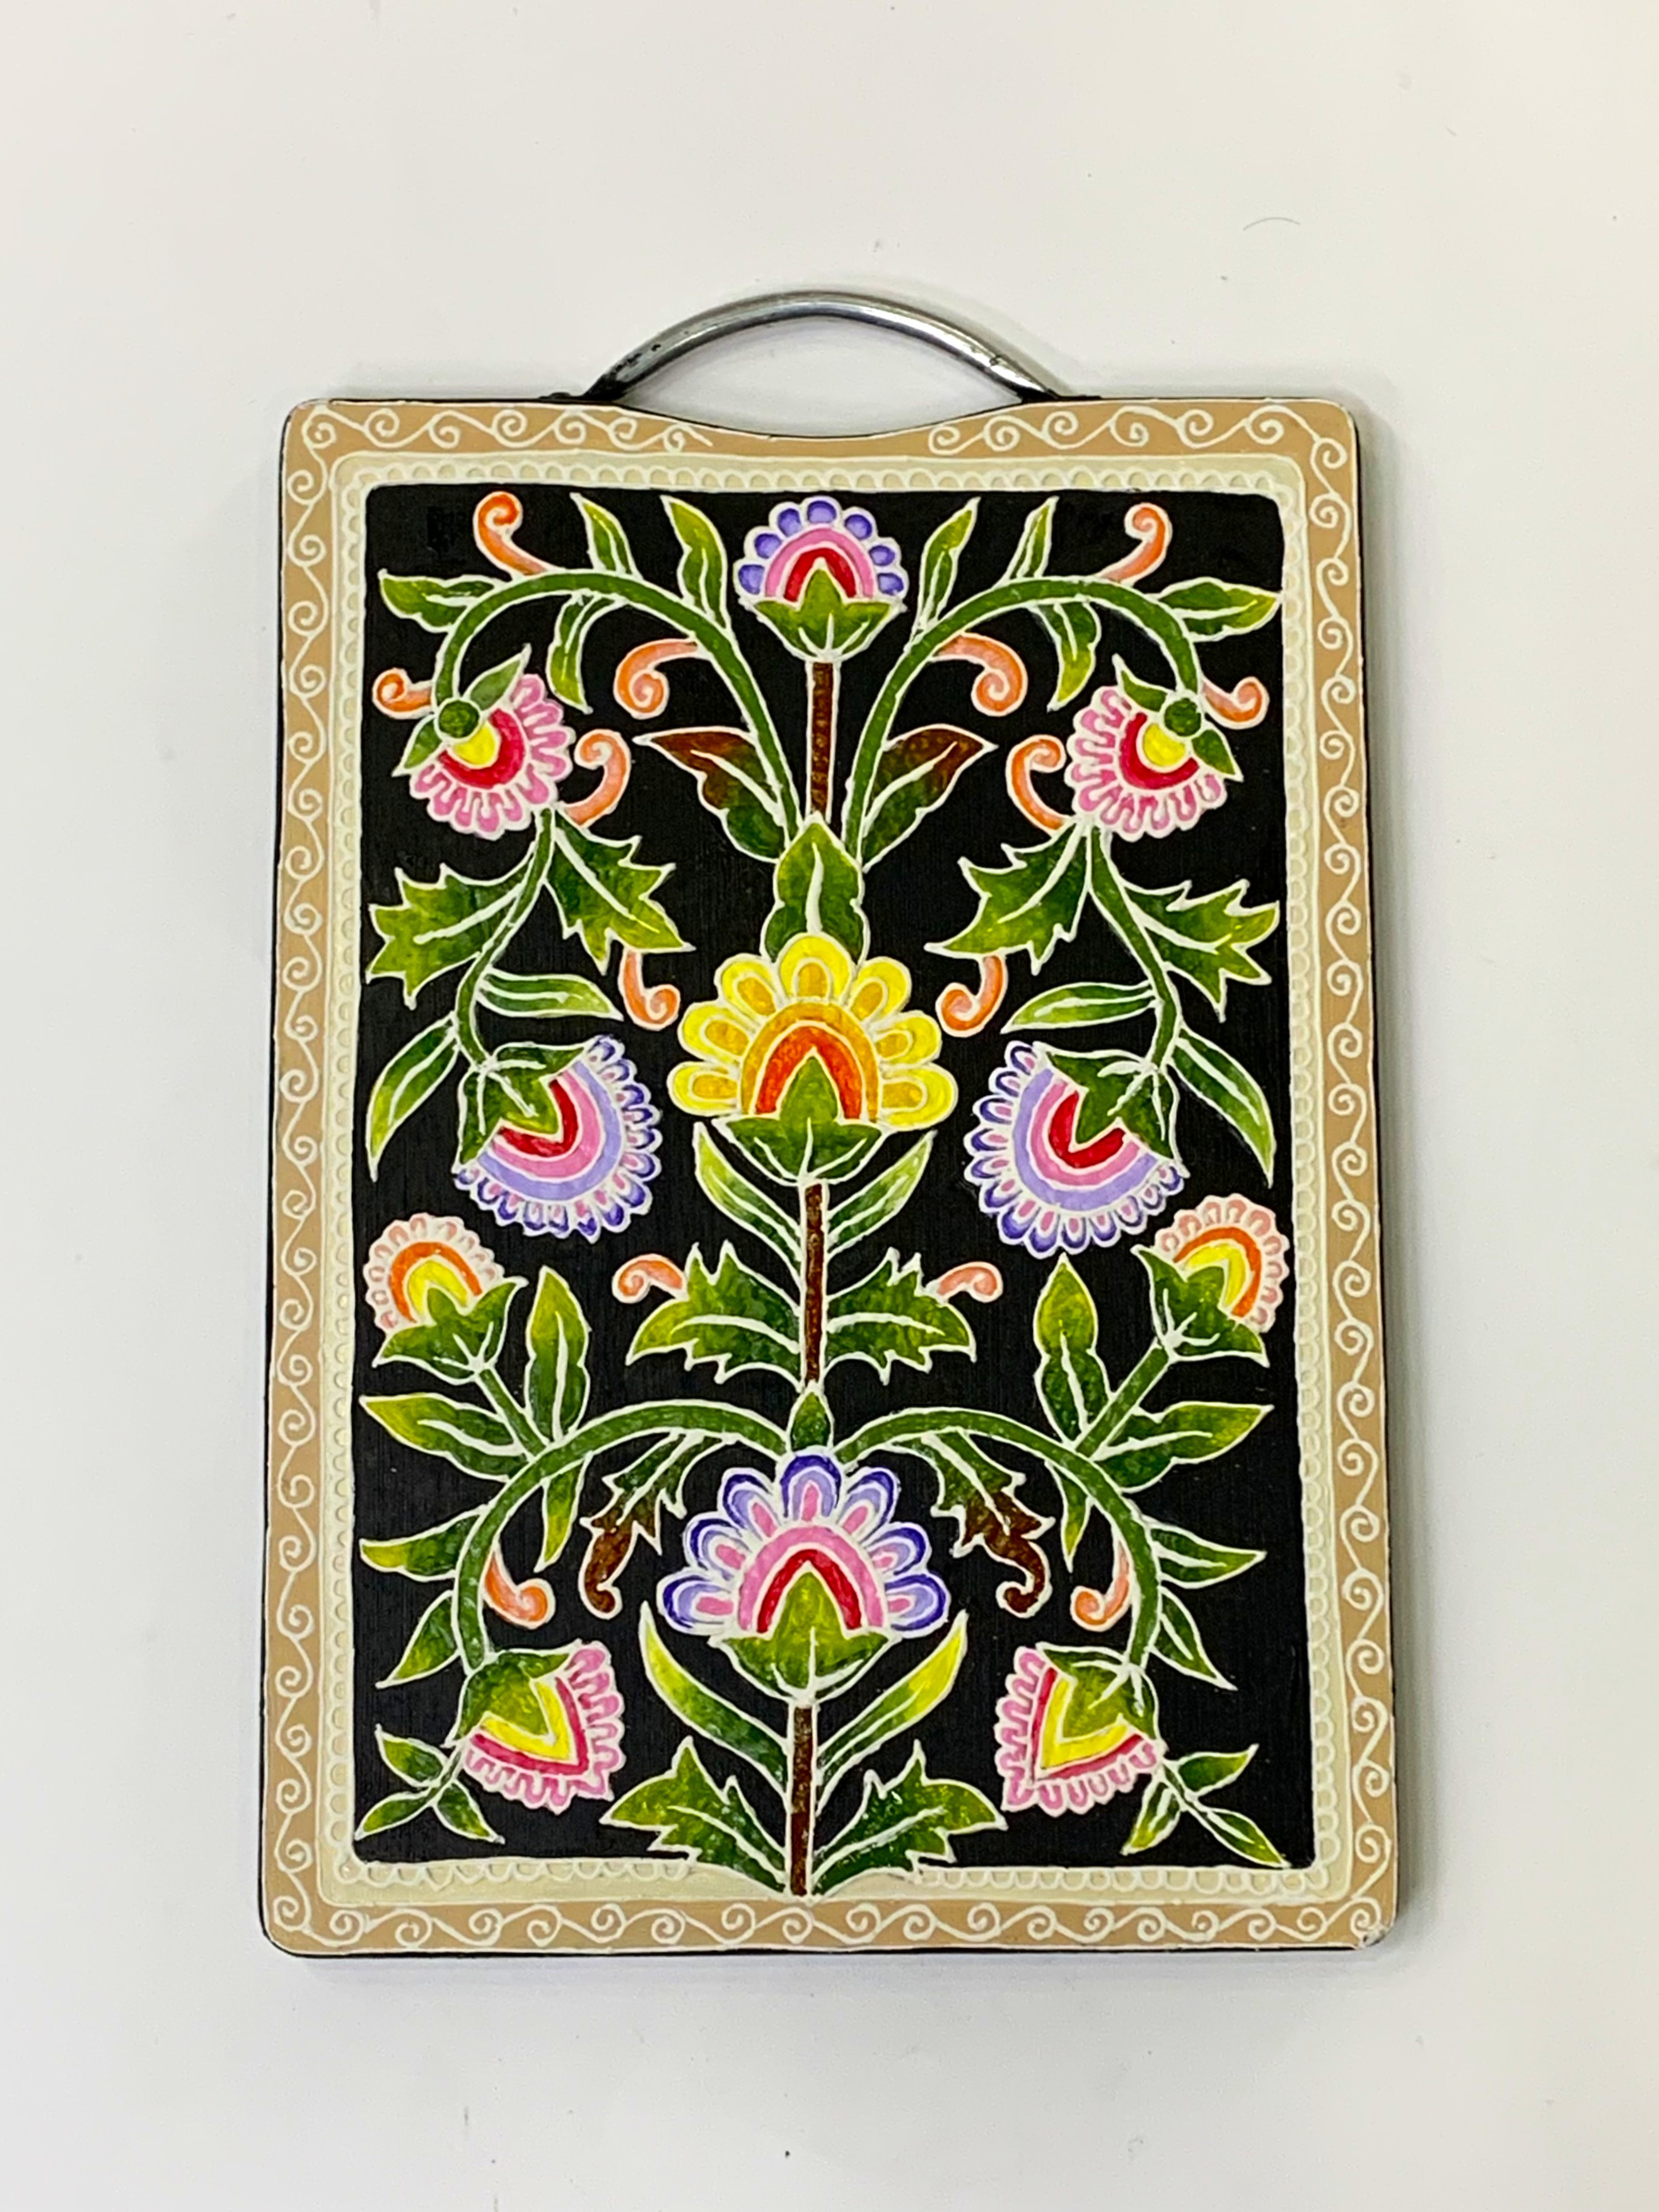
Chopping Board With Relief Work Design


You Will Need:
Fevicryl Acrylic Colours - Burnt Sienna 01, Black 02, Chrome Yellow 03, Crimson 04, Orange 17, Sap Green 21, Violet 25, White 27, Flesh Tint 30, Fevicryl Pastel Acrylic Colour Kit, Fevicol MR, Fine Art Brushes, Wooden Chopping Board, A3 White Paper, White Carbon Paper, Pencil, Soft Plastic, White Cement/ Ceramic Powder, Masking Tape, Colour Palette, Water Container.
Product Used:

Description :
Transform a wooden chopping board into a stunning decorative piece with intricate relief art using white cement and vibrant Acrylic Colours.
STEP 1 : Procure the Base and Paint the Base Coat

- Start by decorating the wooden chopping board with relief art using White Cement/ Ceramic Powder and Acrylic Colours.
- Begin by painting the chopping board with Acrylic Colour Black 02.
- Allow it to dry completely.
STEP 2 : Draw and Trace the Design
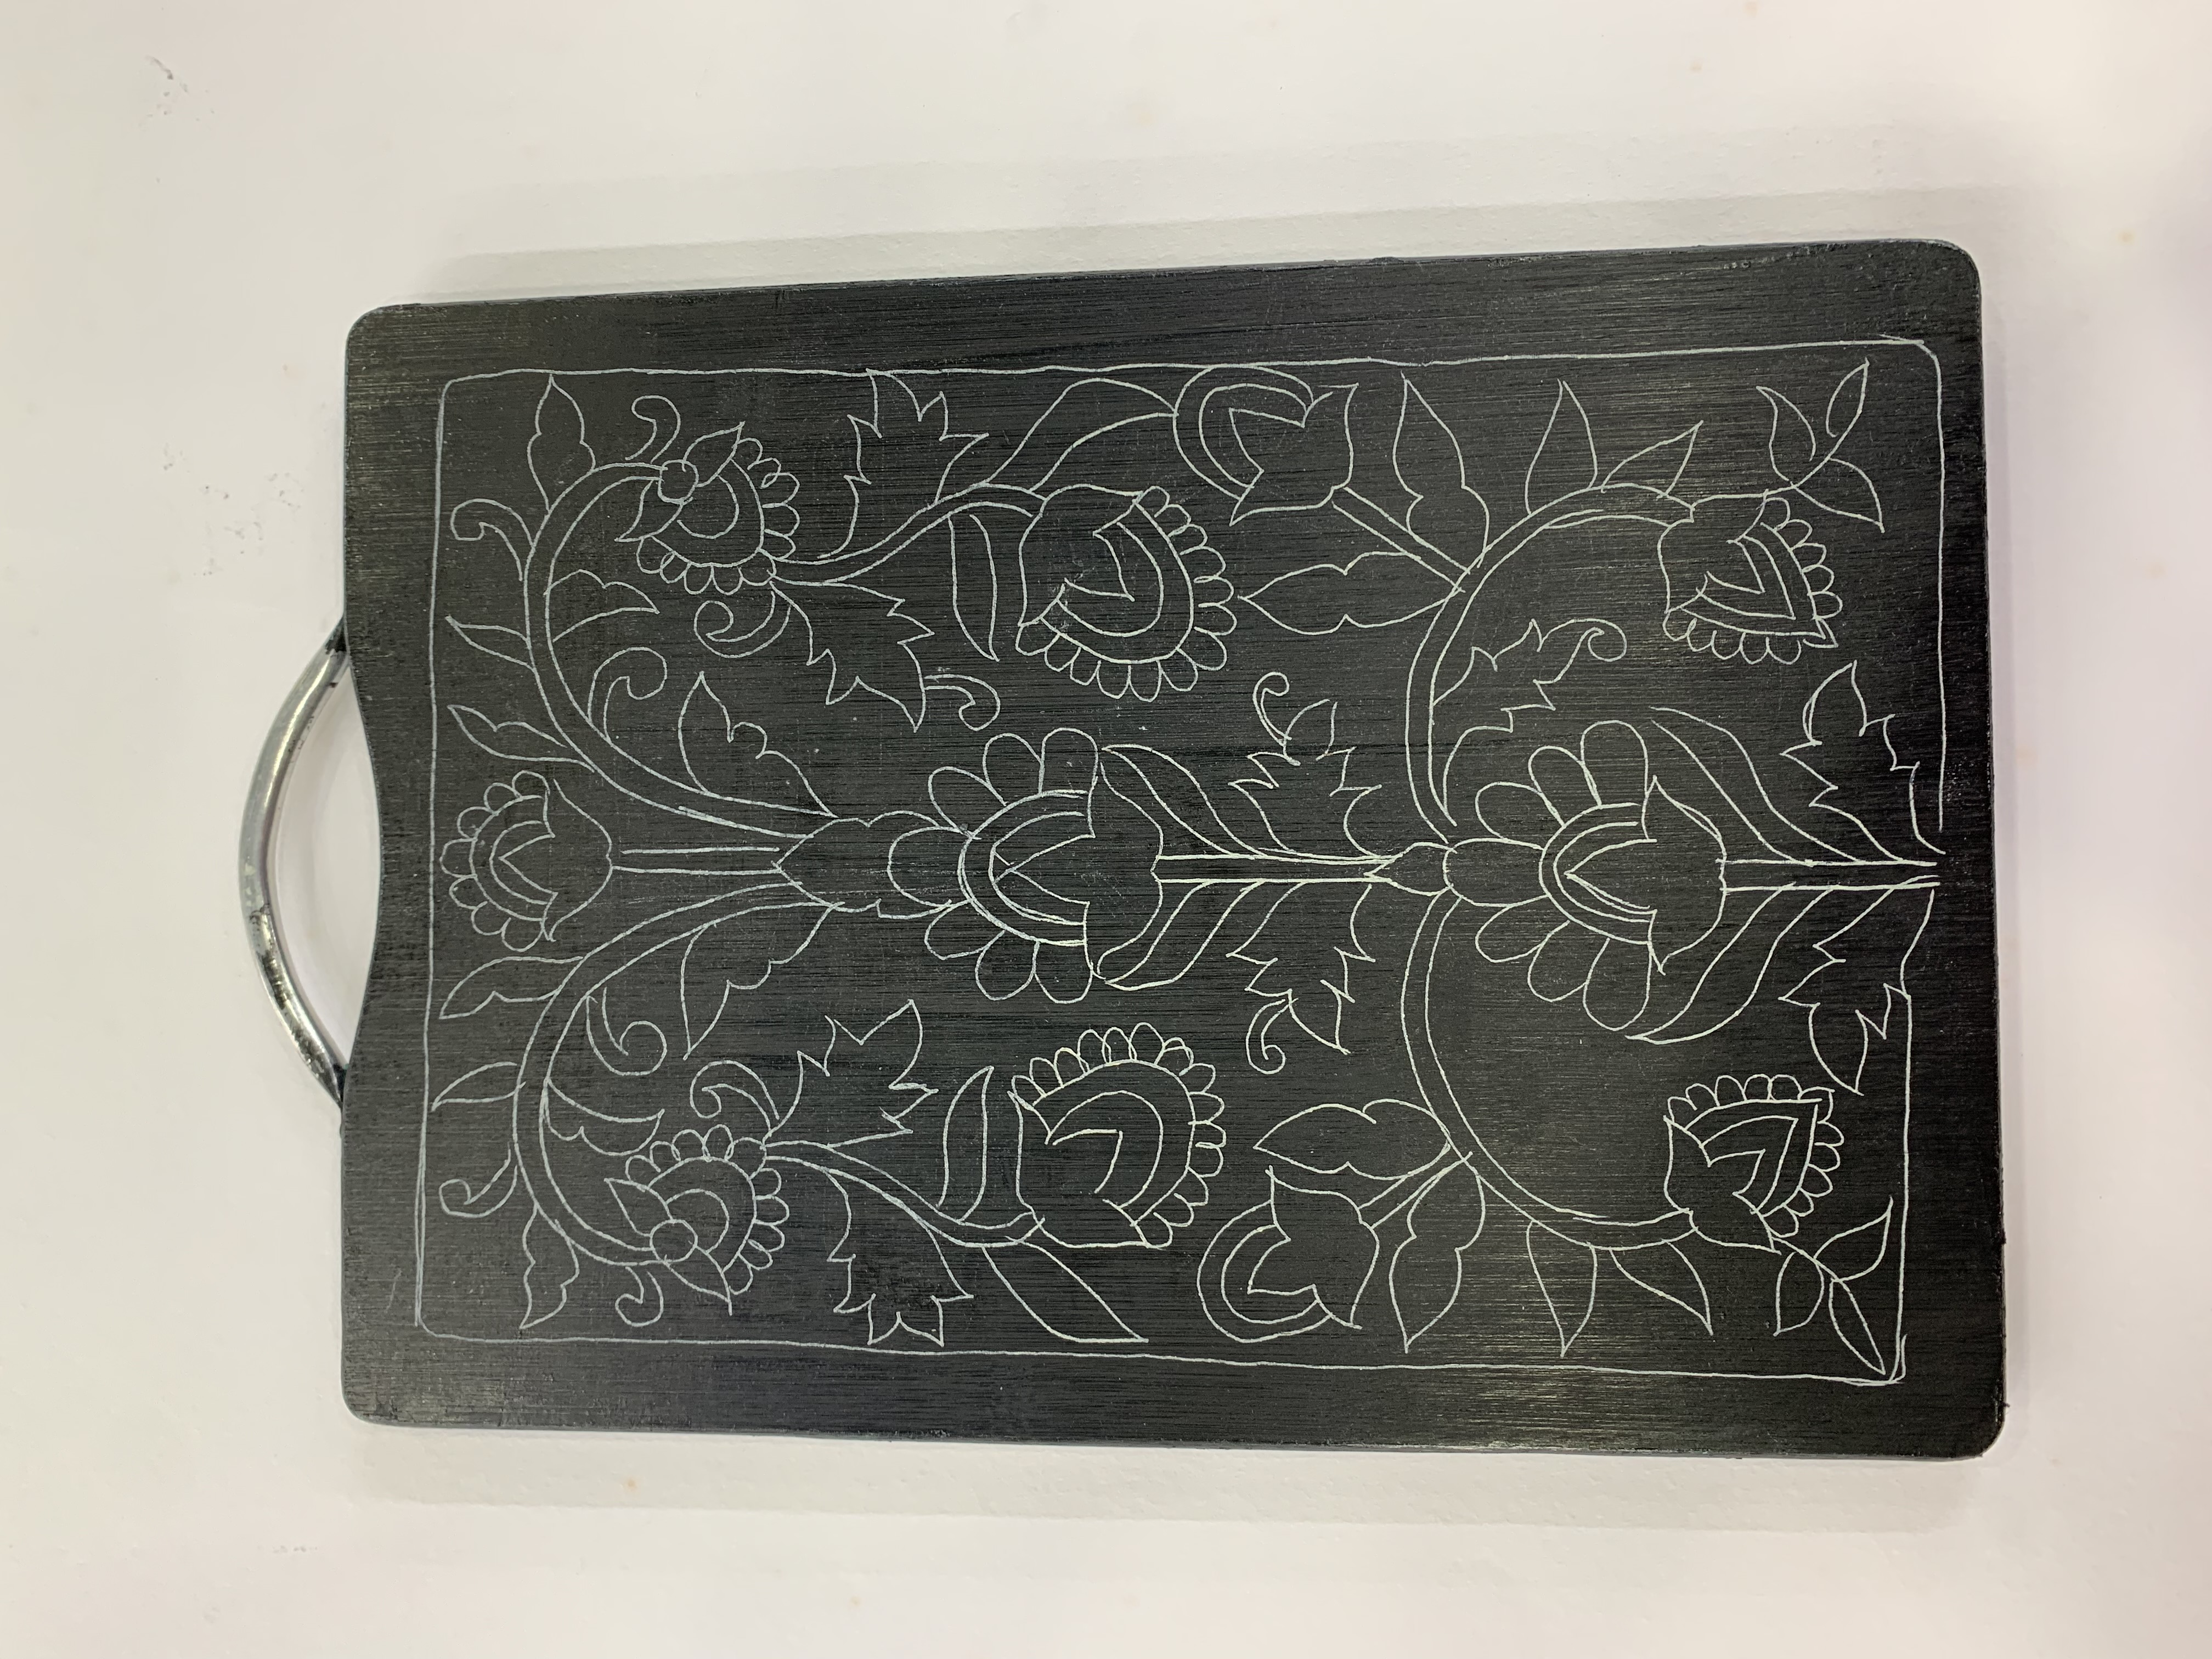
- On an A3 white paper, draw the floral design.
- Trace the design onto the chopping board using white carbon paper.
- Refer to the image for guidance.
STEP 3 : Fill Up the Design
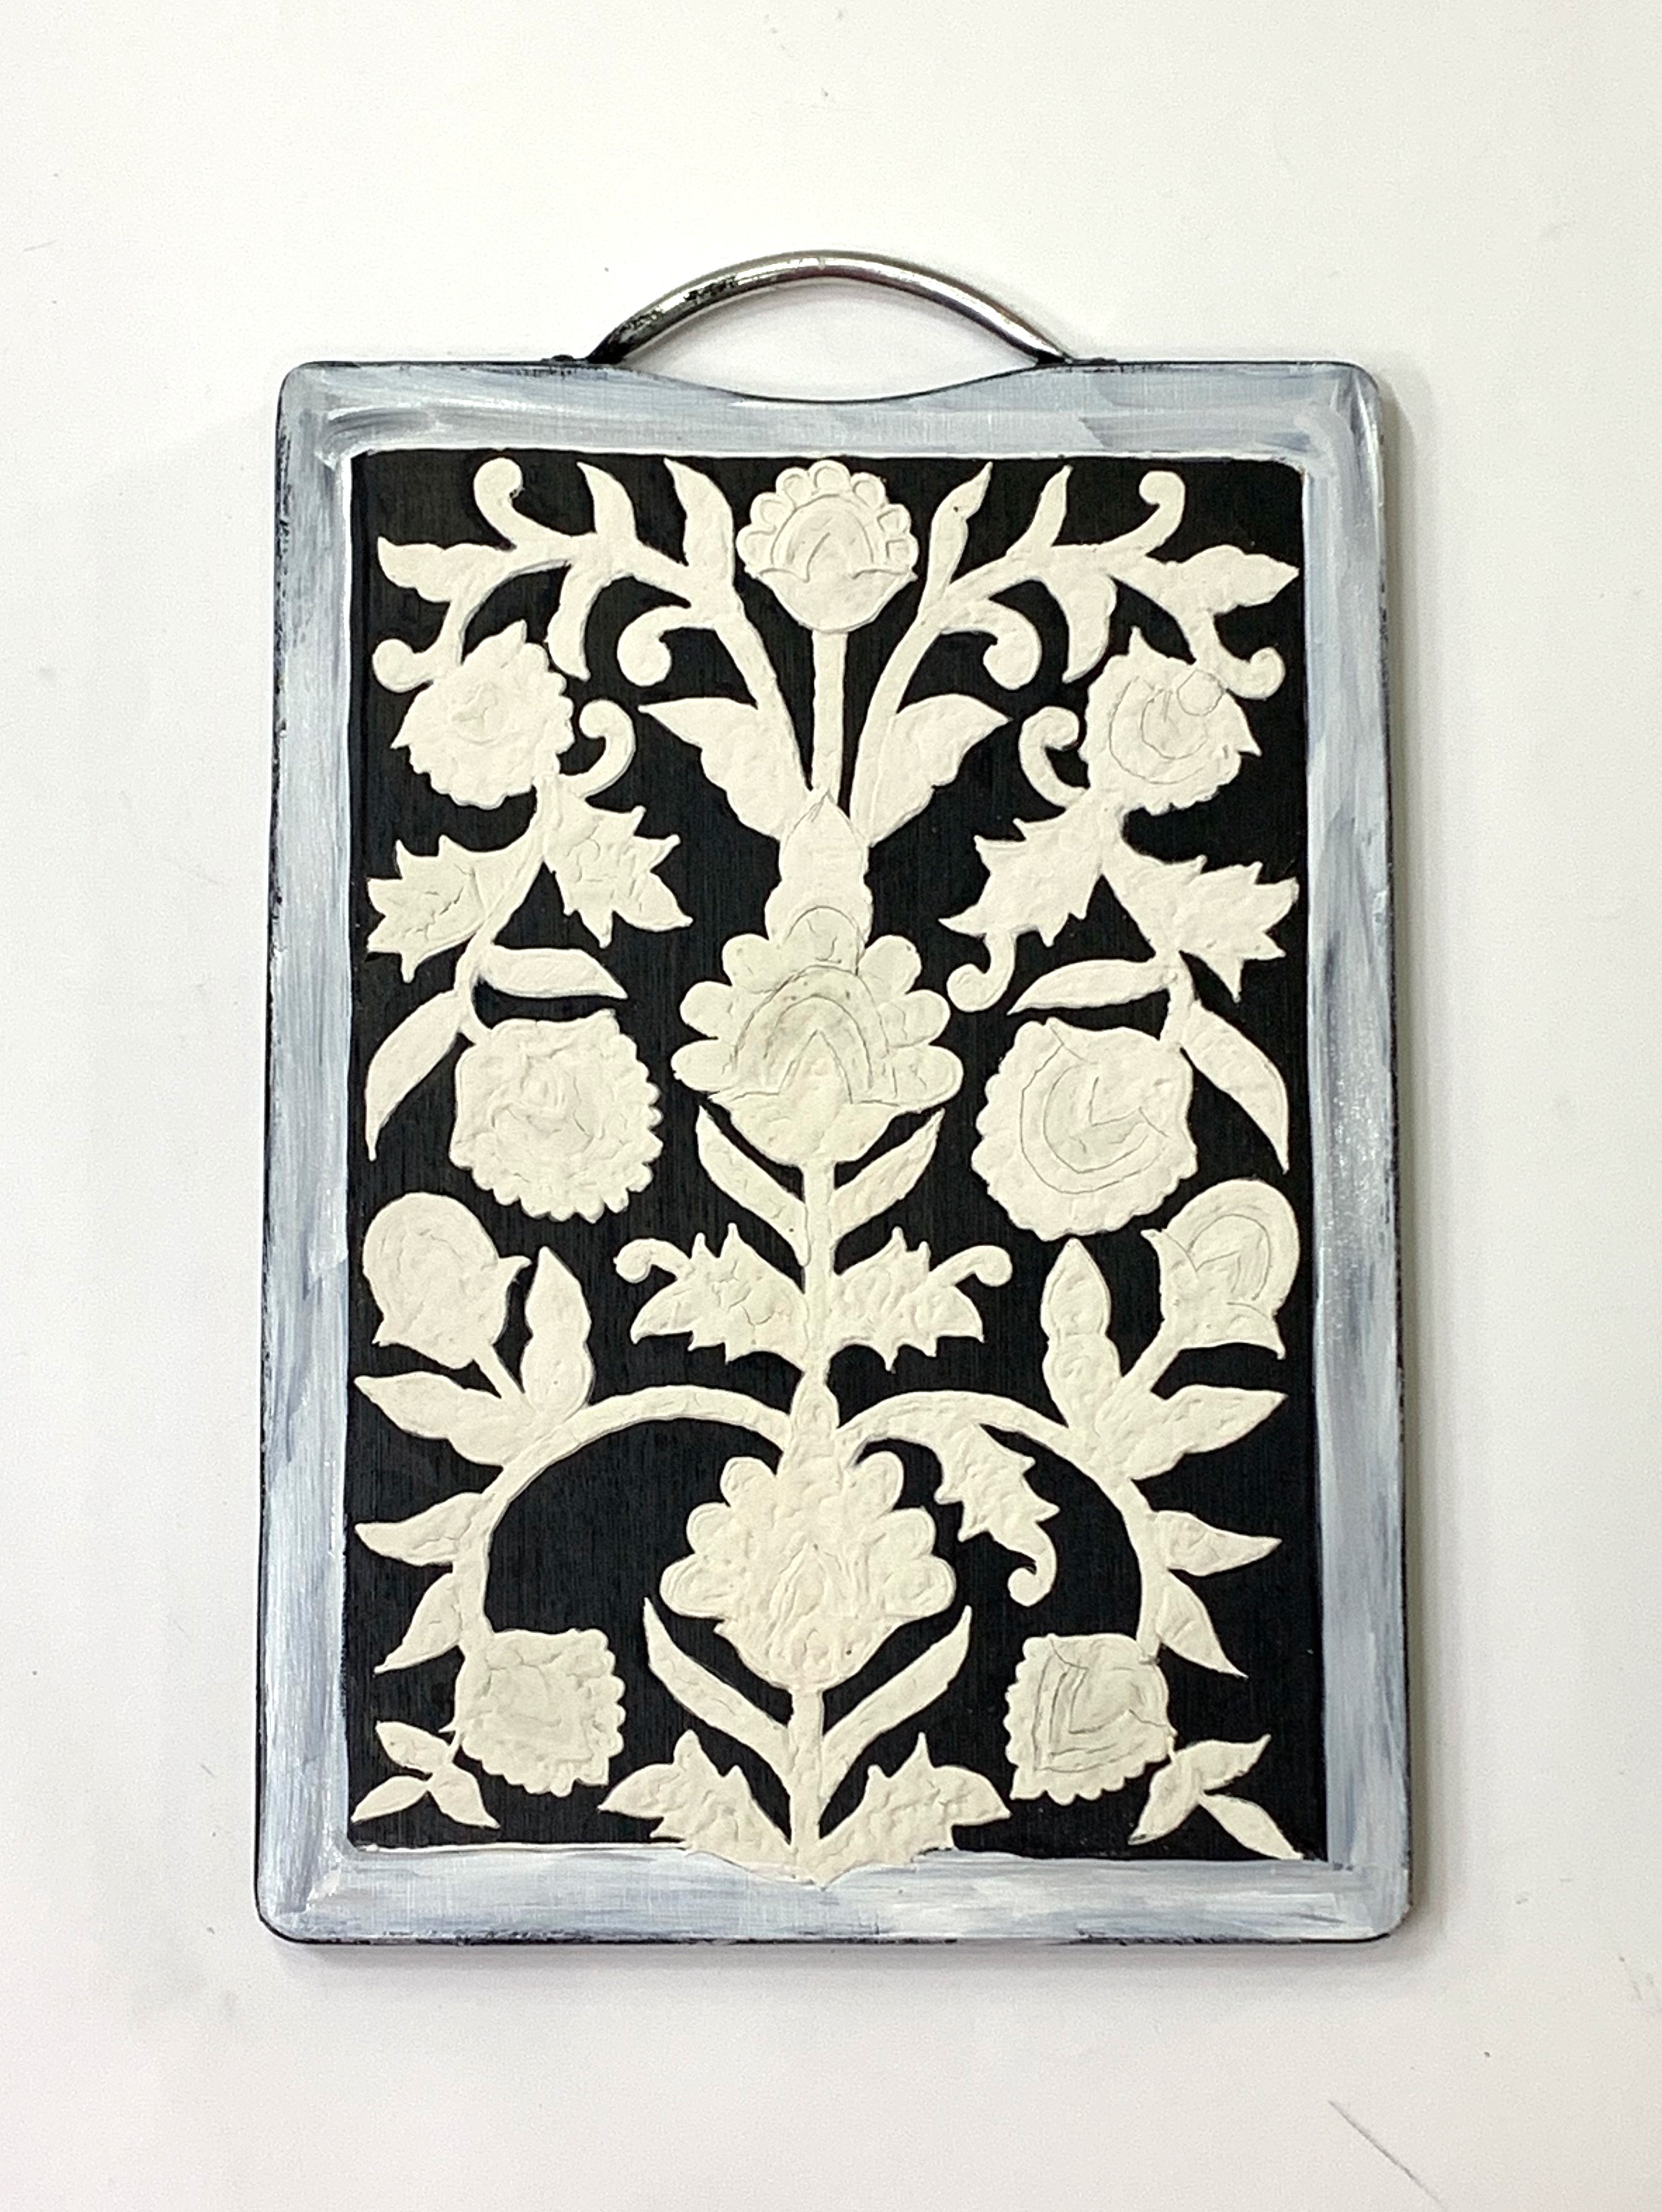
- Create a cone using soft plastic and masking tape.
- In a plastic bowl, mix White Cement/ Ceramic Powder with Fevicol MR and a small amount of water.
- Pour the mixture into the cone.
- Use the cone to outline and fill the design on the chopping board. Allow it to dry.
- Paint a ½” border around the design using White Acrylic Colour.
- Let it dry thoroughly.
STEP 4 : Paint the Design
- Paint the relief design using Acrylic Colours - Burnt Sienna 01, Black 02, Chrome Yellow 03, Crimson 04, Orange 17, Sap Green 21, Violet 25, White 27, Flesh Tint 30, and Pastel Acrylic Colours from the Kit.
- Let the paint dry completely.
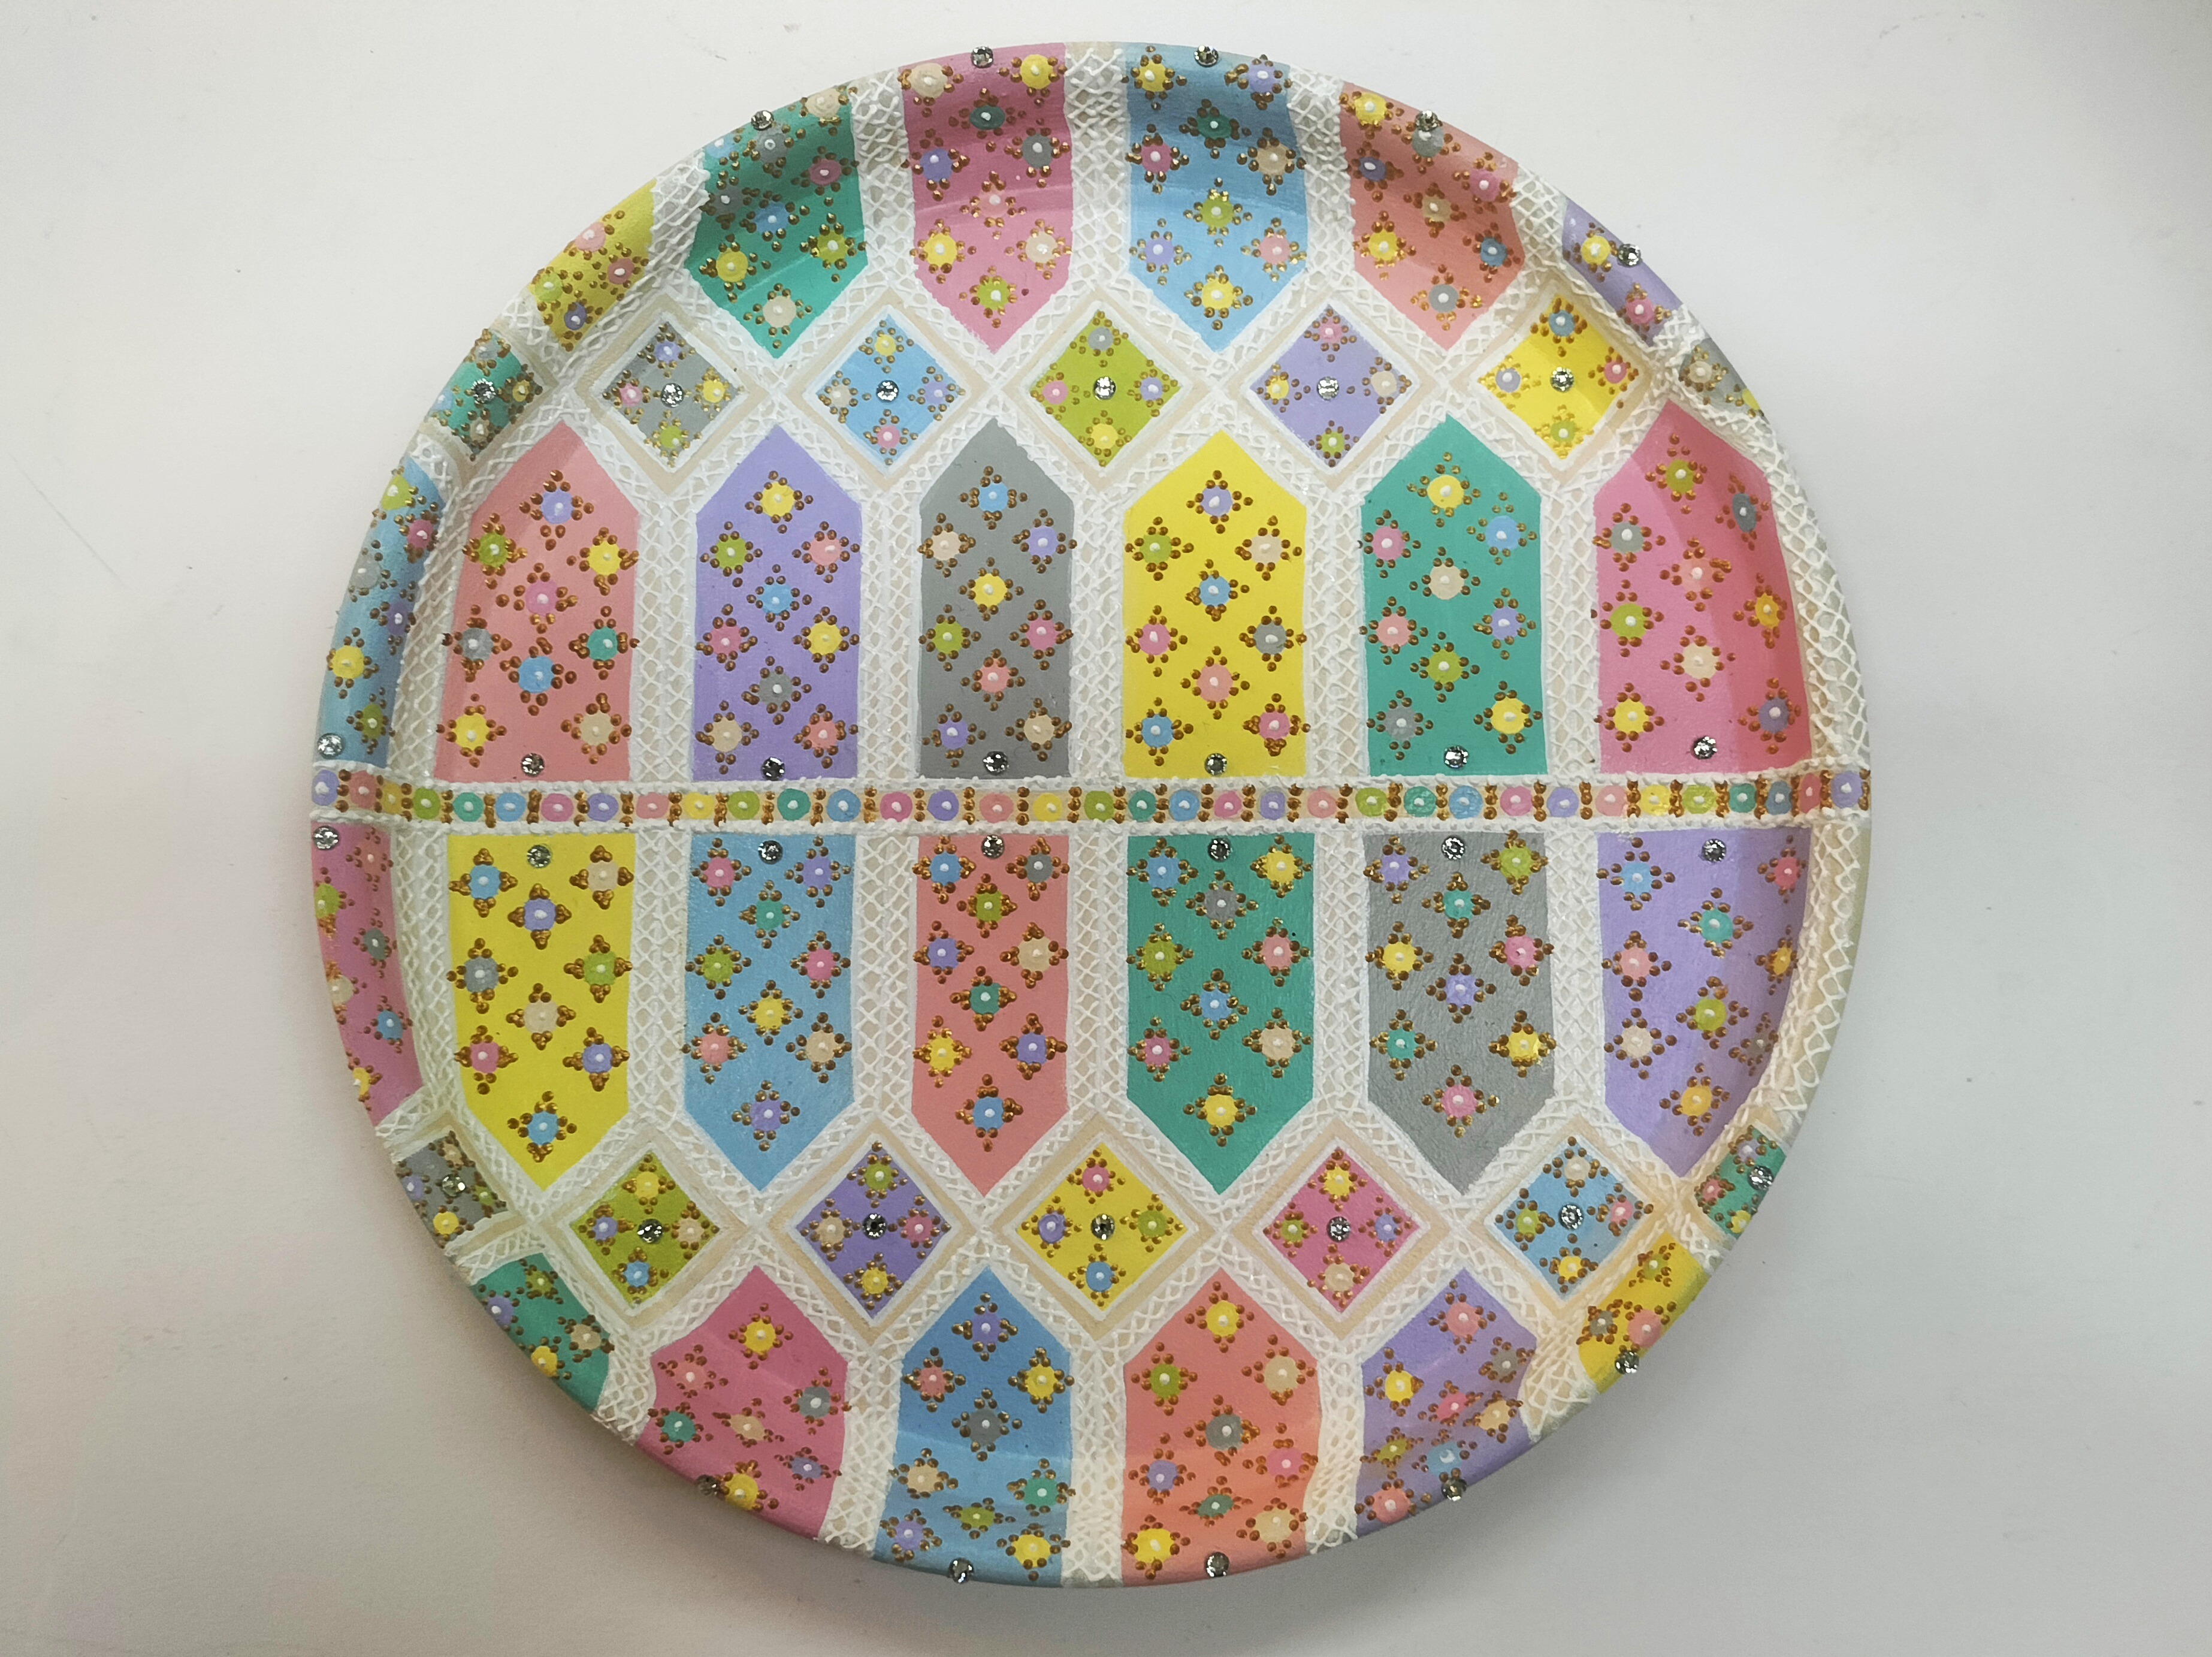
STEP 5 : Final Look

- Your chopping board decor with relief work is now ready.
- Use it as a decorative piece to enhance your wall art.


 +91 99676 55545